Outlook 365 EMail Settings for Windows Hosting
Outlook 365 EMail Settings for Windows Hosting
Configure Outlook 365 for Windows Hosting -
This article explains how to configure Microsoft Outlook 365 to send and receive emails on an email account you may have setup yourself, or has been setup for you by 123 Simples.
1. Open Microsoft Outlook 365.
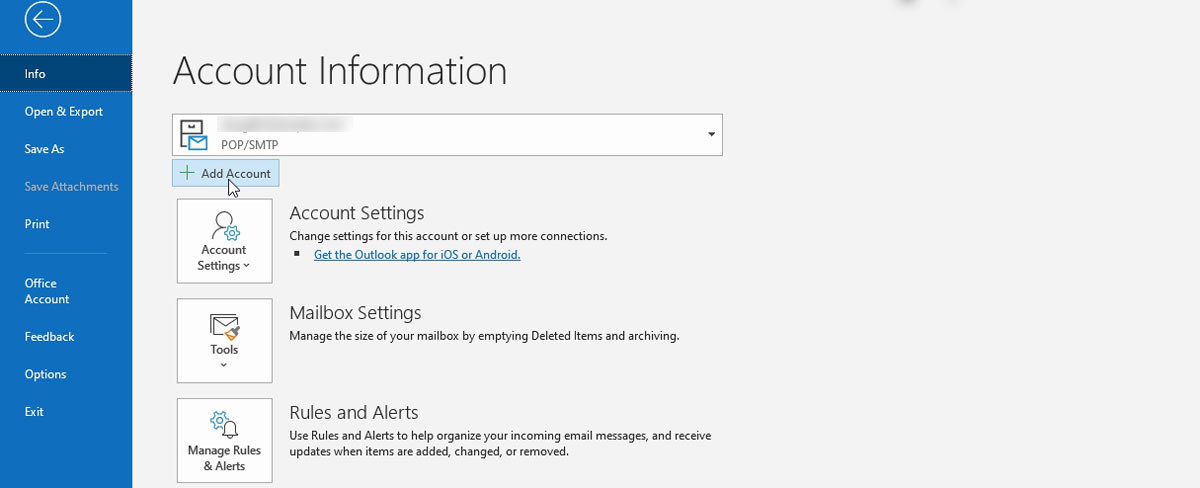
2. Click on the File tab, select Info, and then choose Add Account.

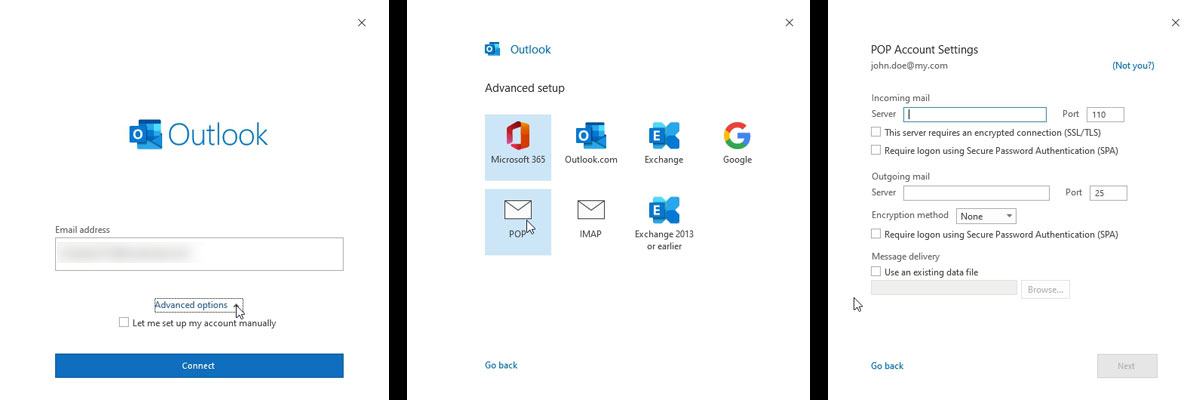
3. When the email settings wizard opens type in the email address, then click on Advanced Options on the Auto Account Setup window and select Let me setup my account manually. On the next window choose POP as the account type you are setting up.

4. On the Internet E-Mail Settings window, enter your user information, server information and logon information.
Your Name: enter your name as you would like it to appear in incoming or outgoing emails
E-mail Address: the one you have setup in your MSPControlPanel, or that has been setup for you by us
Account Type: POP3 will be selected as we chose this already
Incoming mail server: pop.WebSiteLive.net
Port number: 995
This server requires an encrypted connection (SSL/TLS) - Check this box
Outgoing mail server: smtp.WebSiteLive.net
Port number: 587
Use the following type of encrypted connection - Select STARTTLS from the drop down menu
User Name: will be your actual email address that you have setup in your control panel, or that has been setup for you by us
Password: will be the password you setup for that email address, or that has been setup for you by us
Put a tick in remember password
5. Click on the Finish Button.
Congratulations, you have now setup Outlook 365 to send and receive emails from your email account.
